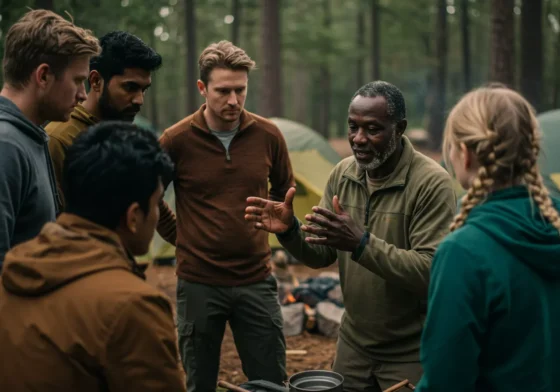
Gather ‘round, folks. There’s a certain kind of magic that settles in when the sun sinks low and the evening air turns sharp. In those moments, knowing how to turn a handful of sparks into a steady, crackling fire isn’t just useful—it’s essential. It’s your heat, your hot meal, and maybe most importantly, your comfort. There’s something about watching those flames dance after a long day outside that just settles the soul. So let’s dig into the art of firecraft—because finding that fire within and bringing it to life out here? That’s where the real wilderness connection begins.
Now, you might think starting a fire is simple. And yeah, sometimes it is. But try doing it in a persistent drizzle, or when the wind is determined to play keep-away with your flame. That’s where knowing the how and why makes all the difference. It’s not just about throwing stuff together and hoping for the best; it’s a bit of science, a bit of art, and a whole lot of patience.
The Holy Trinity: Oxygen, Fuel, and Heat
You’ve probably heard it before, but it bears repeating because it’s the absolute core. A fire needs three things: Oxygen, Fuel, and Heat. Mess up any one of these, and you’re left with smoke and frustration.
- Oxygen: Fire breathes, just like us. It needs airflow. Try smothering a tiny flame, and you’ll see what I mean. When building your fire, think about how air will get to and through your fuel.
- Fuel: This is your wood, in all its stages. We’ll break this down, but remember it’s a progression from tiny, easy-to-ignite stuff to bigger logs that burn long and hot.
- Heat: This is your spark or flame that kicks the whole process off. Get this initial heat source right, and you’re well on your way.
Building Blocks: From Whispers to Roar
Getting a fire going is like building a relationship – you start small and build trust. In firecraft, that trust is built with your fuel, starting with the most eager-to-please bits.
- Tinder: This is your absolute beginner. It needs to be bone-dry and catch a spark or tiny flame instantly. Think wispy, fluffy stuff.
- Natural Tinder: Bird’s nests (check for inhabitants first!), the inner bark of cedar or birch (shredded finely), really dry grass (rub it between your hands to make it fluffy), cottonwood fluff, cattail fluff (the brown fuzzy tops), even those dry, dead ferns.
- Prepared Tinder: Cotton balls soaked in petroleum jelly (vaseline) are absolute magic – waterproof and burn for a surprising amount of time. Commercial fire starters are great too, but the Vaseline cotton balls are cheap, effective, and easy to make yourself. Dryer lint works in a pinch, but can be greasy and burn fast.
- Pro Tip: Always have some prepared tinder in a waterproof bag in your pack. Don’t rely solely on finding natural stuff, especially if it’s damp.
- Kindling: Once your tinder is burning, you need slightly larger, but still small, fuel to catch. This is your kindling.
- Look for dead twigs and small branches, roughly the size of a pencil up to your thumb.
- Crucially: Snap them. If they bend, they’re too green or wet. Dry wood snaps crisply.
- Gradually increase the size of your kindling. Start with pencil-lead thin, move to pencil-thick, then finger-thick.
- Firewood: This is the main course. Once your kindling is burning strong, you add larger pieces to build a sustainable fire for warmth or cooking.
- Start with wrist-thick pieces, then move up to larger logs.
- Hardwoods (oak, maple, hickory) burn longer and hotter, great for overnight warmth or sustained cooking.
- Softwoods (pine, fir, spruce) catch easier and burn faster, good for getting a quick fire going, but you’ll need more of it. They also tend to spark and pop more.
- Finding Dry Wood: Even in the wet, look for dead branches still on trees (they call these “squaw wood” sometimes) – they are often drier than stuff on the ground. Look under overhangs, fallen logs, or even split larger wet logs to get to the drier core.
Lighting the Way: Your Heat Source
You’ve got your fuel ready. Now for the spark! Always carry at least two reliable methods. Redundancy is your friend in the outdoors.
- Waterproof Matches: Good old reliable, but they must be waterproofed. Dip them in wax or buy the ones that are already coated. Keep them in a waterproof container.
- Lighters: A basic Bic lighter is small, light, and effective. Utility lighters with a longer nozzle are great for reaching into your fuel pile. Just know they can struggle in the cold or wind.
- Ferrocerium Rod (Ferro Rod): These things are bombproof. They throw a super hot spark, work when wet, and last forever.
- How to Use: Scrape off the protective coating first. Place the rod on top of your tinder. Use a sharp 90-degree spine (on your knife or the included striker) and scrape away from your body, pressing down firmly on the rod. The goal isn’t to scrape quickly but to generate a hot shower of sparks directed right at your tinder. Practice this at home! It takes a bit of getting used to.
- Other Methods (Advanced/Emergency): Magnifying glass on a sunny day, friction methods (bow drill, hand drill). These are harder and take practice, but knowing the principles is valuable if you lose your primary tools.
Laying the Foundation: Building Your Fire Bed
How you arrange your fuel matters. The goal is to get that initial flame to spread from your tinder to the smallest kindling, then progressively to the larger pieces.
- Site Selection: Clear a patch down to bare earth. Make sure there are no low-hanging branches above you. Consider wind direction and potentially build a small shield (using rocks or a log) on the upwind side.
- The Lay:
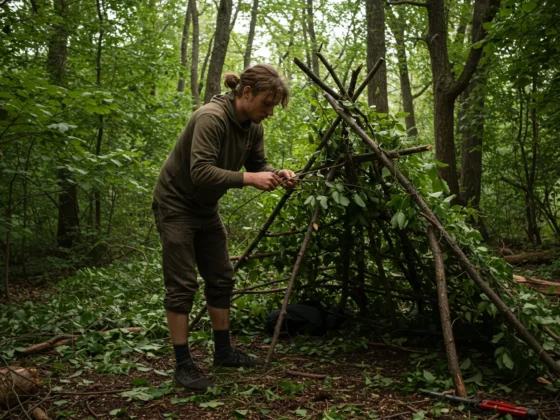
- Teepee: Build a small teepee of your smallest kindling over your tinder nest. As it catches, lean progressively larger pieces against the structure. This is good for getting a quick flame but needs more attention to keep adding fuel.
- Log Cabin: Place two small pieces of kindling parallel. Lay your tinder between them. Place two more pieces of kindling on top, perpendicular to the first two, creating a square. Continue layering, gradually increasing the size of the wood as you build the “cabin” walls, leaving a gap in the middle over the tinder. This lay is more stable and allows good airflow.
- Key: Leave space! Don’t pack the fuel too tightly. Remember, fire needs to breathe!
When Things Get Tricky: Dealing with Damp
Ah, the age-old challenge: wet wood. It happens. Don’t despair, just adapt.
- Find the Dry: Look harder! Under logs, inside hollows, on the underside of fallen trees.
- Process Wet Wood: If you find larger wet branches or logs, you can often split them to get to the drier wood in the center. Use your axe or a large knife and a baton (a sturdy piece of wood) to split it. Shave off the wet outer bark to get to the drier inner layers or wood. Create feather sticks by making thin curls of wood still attached to a larger piece – the dry inner wood is exposed and catches a flame well.
The Unspoken Rule: Fire Safety
Listen up. Fire is a powerful tool, but it demands respect. Messing up fire safety can have devastating consequences for you and the environment.
- Location, Location, Location: Choose a spot clear of flammable materials (dry leaves, grass, overhanging branches) for several feet around your fire pit. Use existing fire rings if available.
- Check Restrictions: ALWAYS check local fire danger levels and regulations. Sometimes, fires are simply not allowed due to dry conditions. Respect that.
- Never Leave Unattended: Do NOT walk away from a burning fire, even for a minute. Flames can spread incredibly fast.
- Extinguish COMPLETELY: When you’re done, put the fire OUT. Pour water on it. Stir the ashes with a stick. Add more water. Stir again. Feel the ashes with the back of your hand. If there’s any warmth, it’s not out. Drown, Stir, Feel. Repeat until it’s cold.
- Leave No Trace: Scatter the cold ashes, naturalize the area if you didn’t use an established ring. The next person shouldn’t be able to tell you had a fire there.
Cooking Over Flames
Once you’ve got a good coal bed, cooking opens up a whole new world.
- Wait for the flames to die down and you have a good bed of red-hot coals. Coals provide consistent, even heat.
- You can cook directly on a grate over the coals, use a stick to roast food, or wrap food in foil and place it directly in the embers.
- A “trench” lay or a “Dakota fire hole” (check regulations, some places don’t allow these) are efficient for cooking as they contain heat and smoke.
Finding Your Fire Within
Mastering firecraft isn’t just about rubbing sticks together (though knowing how to do that is pretty cool). It’s about understanding the elements, reading the environment, and being prepared. It takes practice. So grab some tinder, some kindling, and head to a safe, legal spot (your backyard fire pit is a great start!) and practice getting that flame going. Learn what works and what doesn’t.
There’s a deep satisfaction in being able to create fire from scratch. It connects you to something ancient and fundamental. So, get out there, practice, and find that fire within you. It’ll keep you warm, fed, and confident on your outdoor adventures. Stay safe, and happy trails!